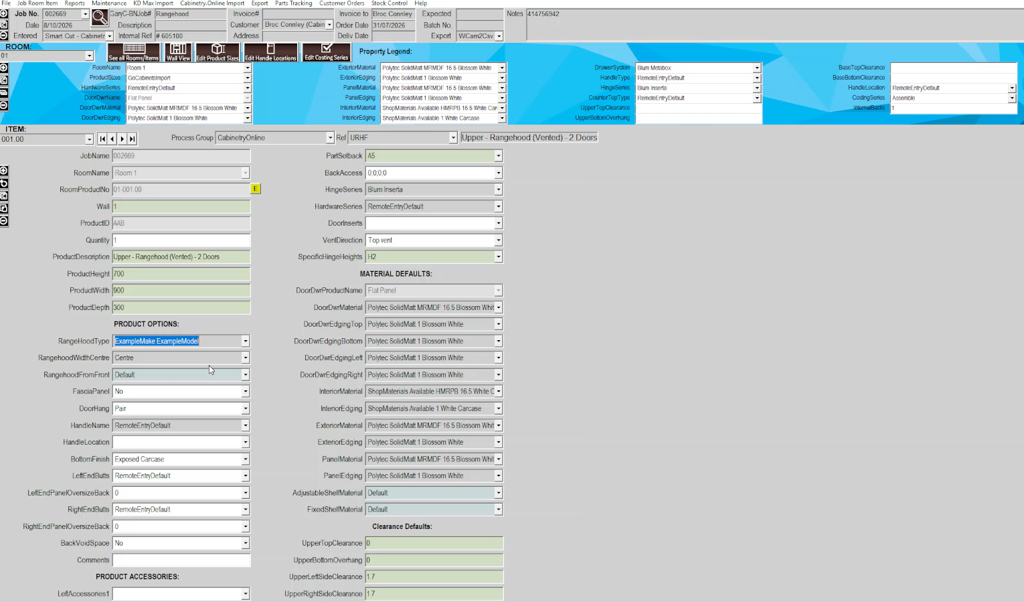
Summary
This guide explains how to add a Rangehood to a WoodCAM job for processing.
 Step-by-Step Instructions
Step | Details |
Step 1 | In WoodCAM, choose Cabinetry.Online Import at the top then select the job CSV file (containing a Rangehood) into WoodCAM. 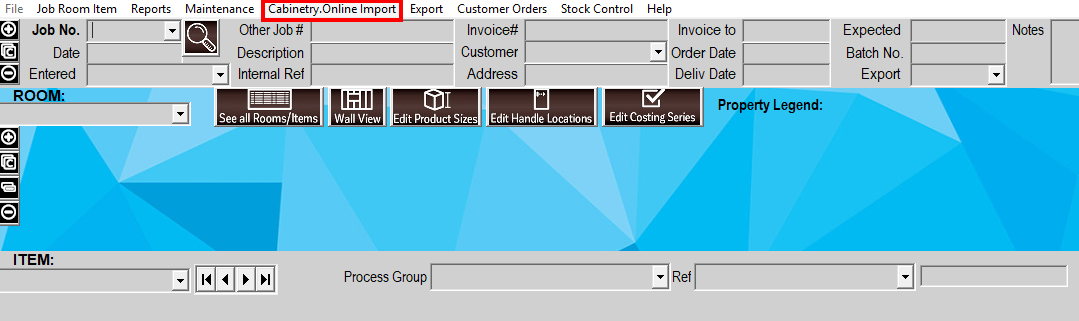
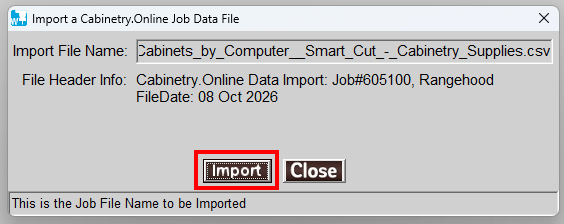
Once the file loads, click Import to proceed
|
Step 2 | An Excel workbook will open automatically, displaying different types of Rangehoods to choose from.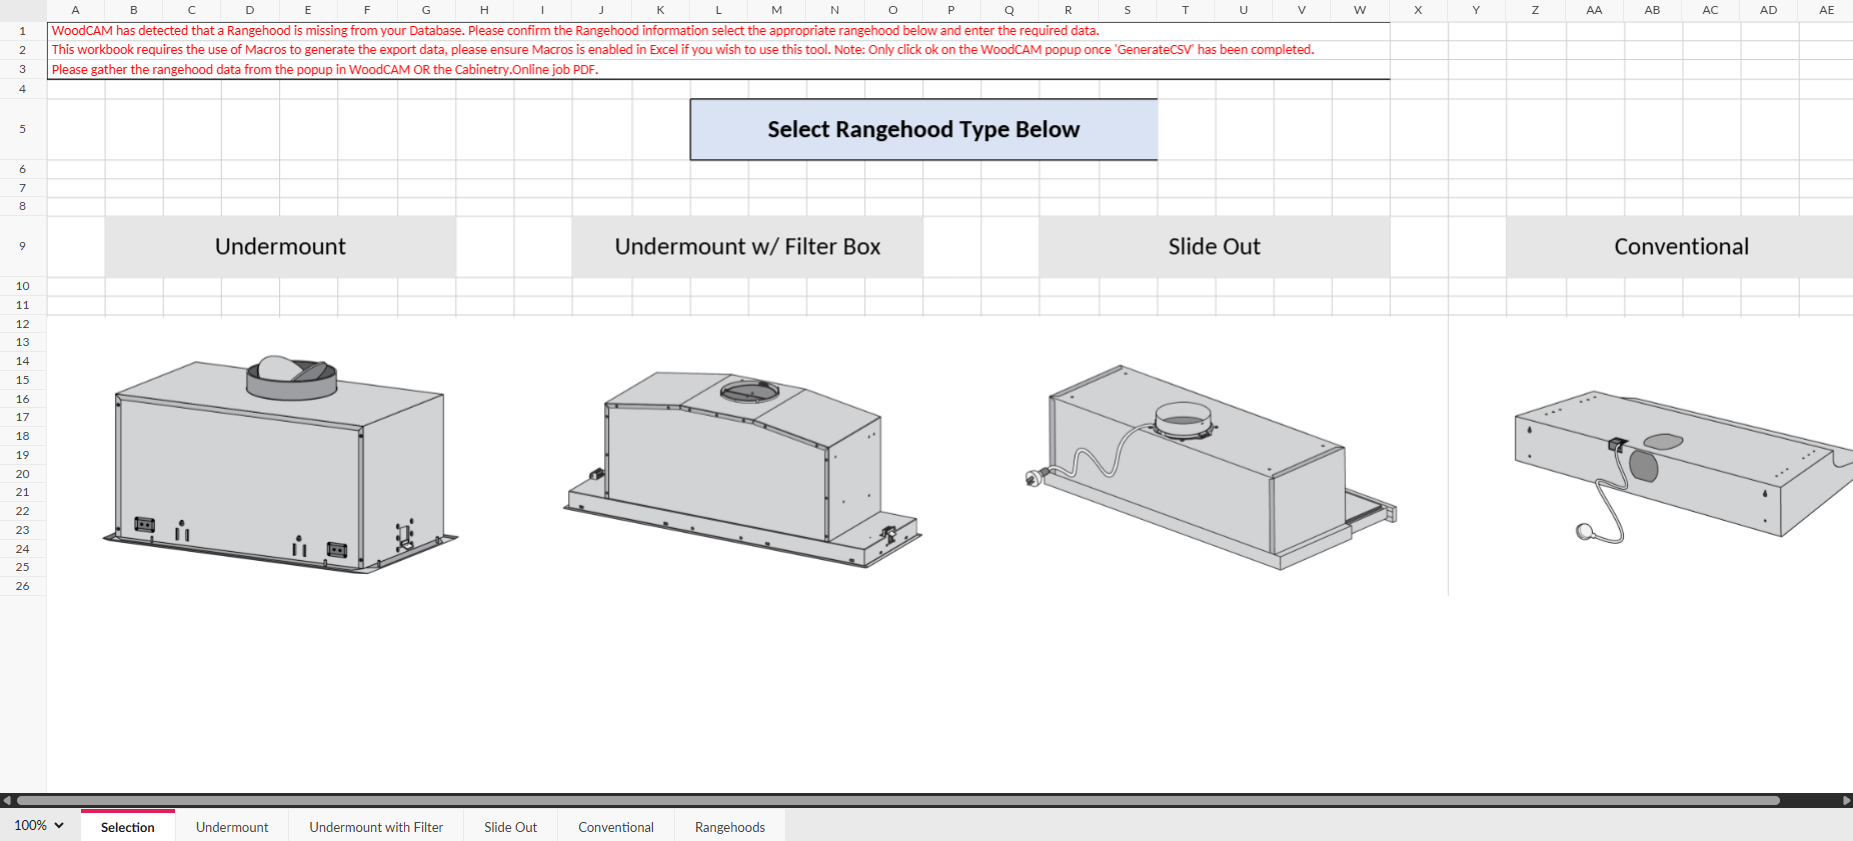 Note: You may need to enable Macros and ensure the file is not read-only. |
Step 3 | Select the Rangehood you require included in the job - e.g. Undermount 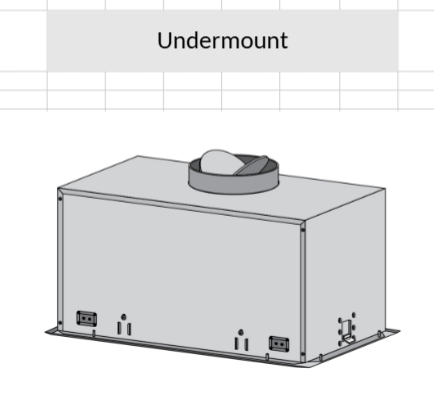
|
Step 4 | Enter the data for the Rangehood required into the BLUE sections at the top to specify measurements and positioning of the Rangehood components. Note: If there are custom adjustments to be made, use the OPTIONAL Advanced Specifications on the right, or leave blank if not required. 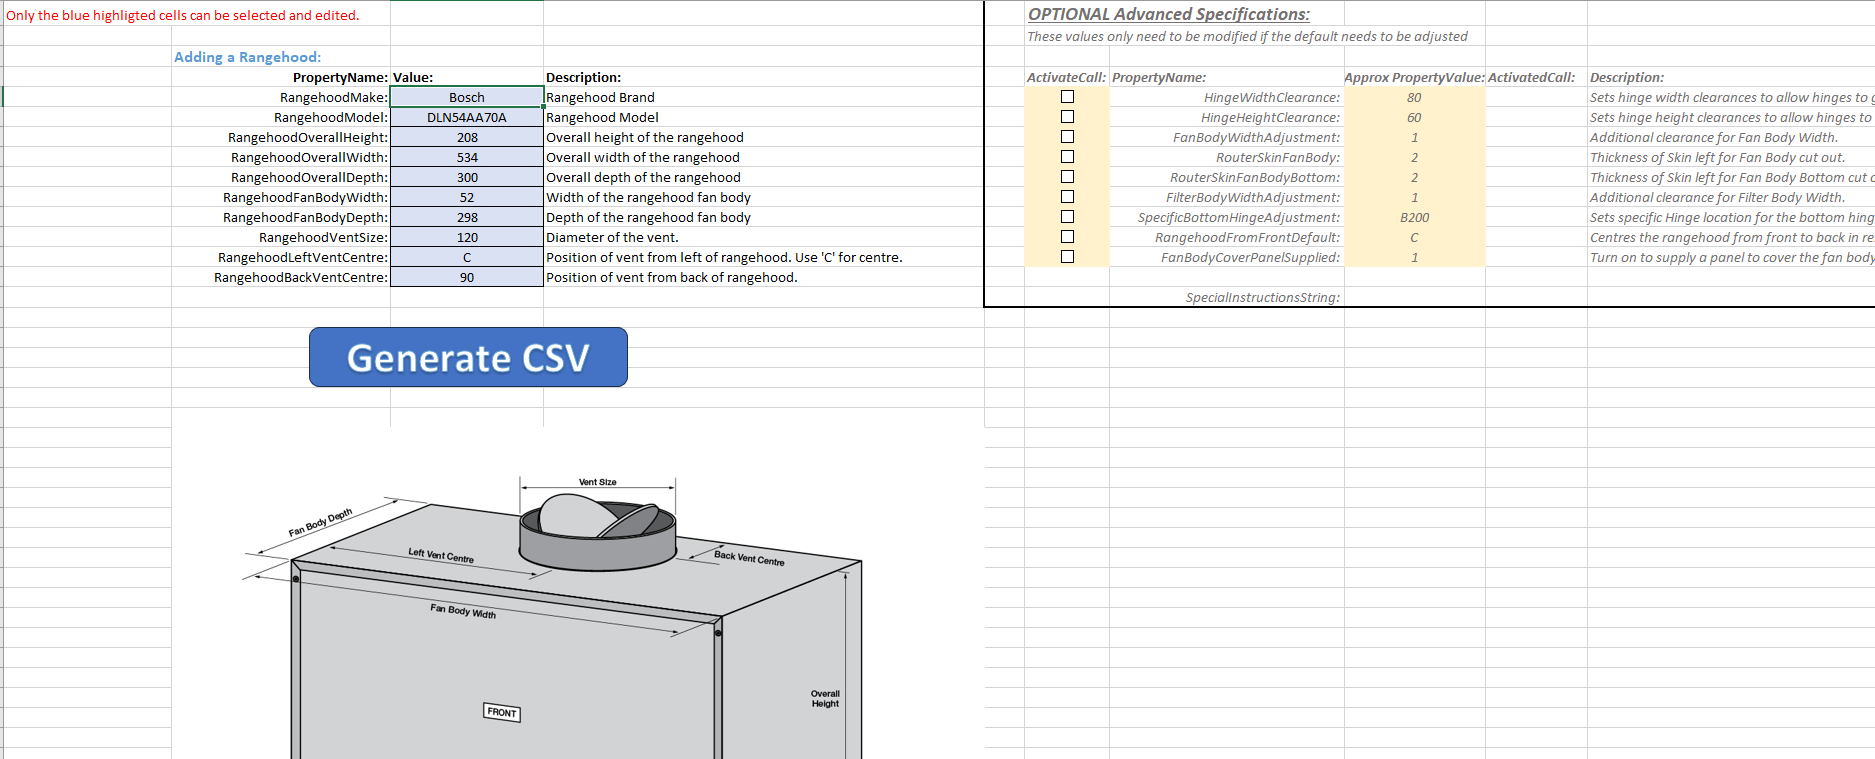 |
Step 5 | Select the Generate CSV button 
|
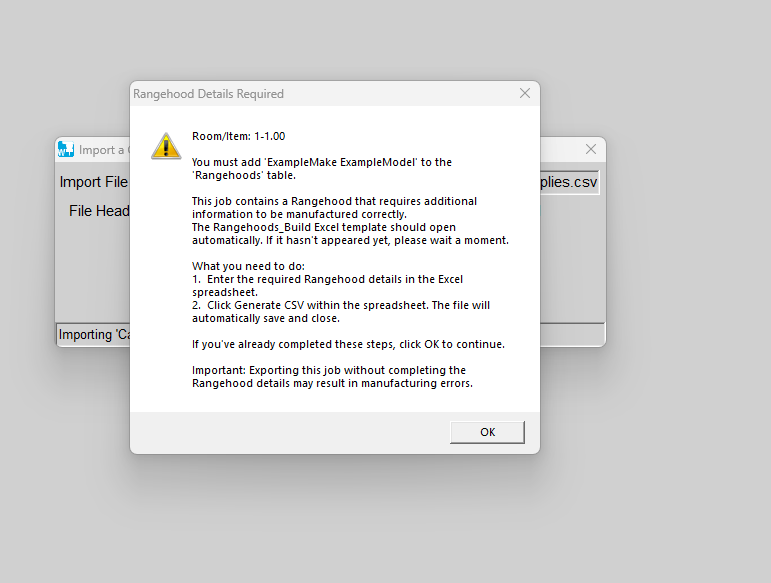
Step 6 | The Excel file will close and you will be directed back to WoodCAM. Click OK to the message about missing Rangehoods. 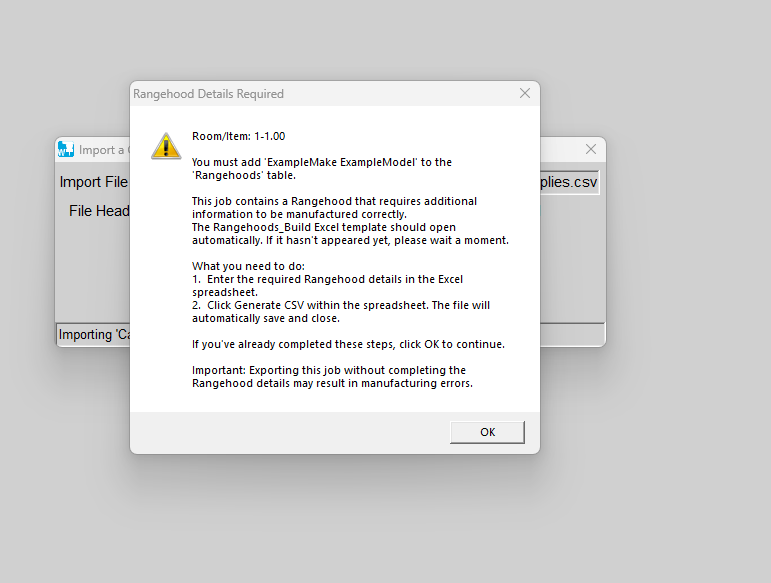
|
Step 7 | The job will be populated with the Rangehood detail. You can now proceed to complete the job  |
 Expected Outcome
Once the Rangehood has been added, the job will open in WoodCAM.