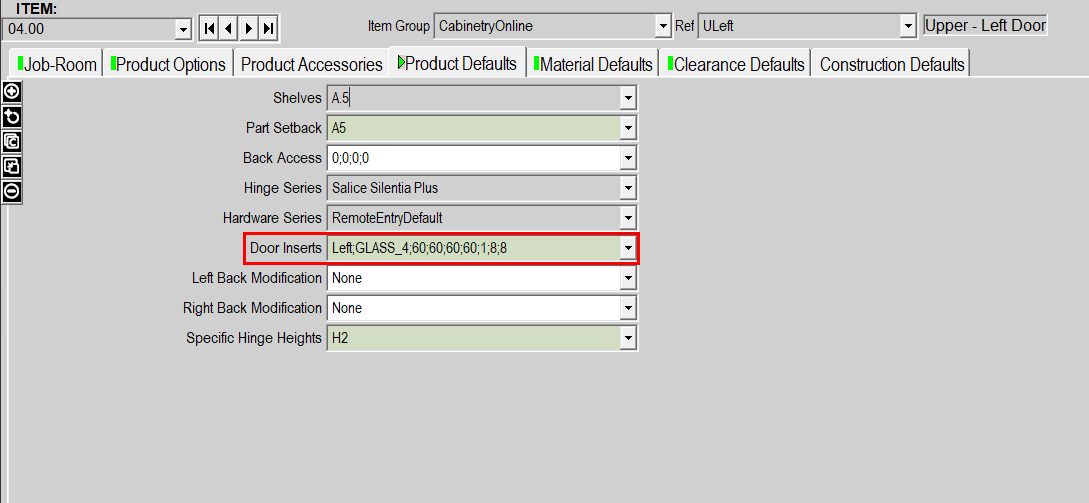
1 - Navigate to the Product Defaults tab.
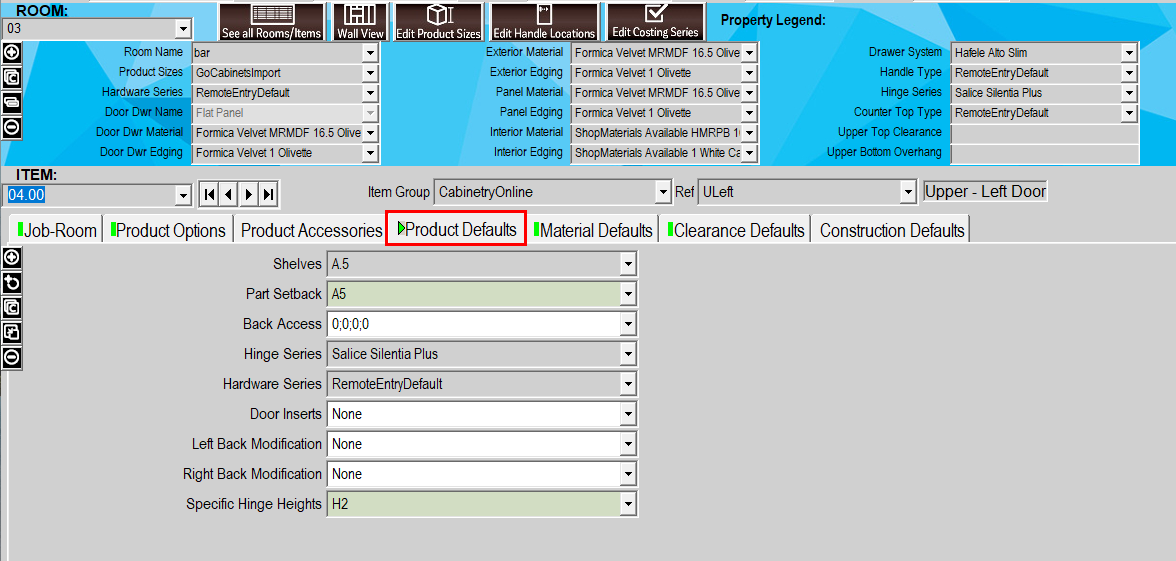
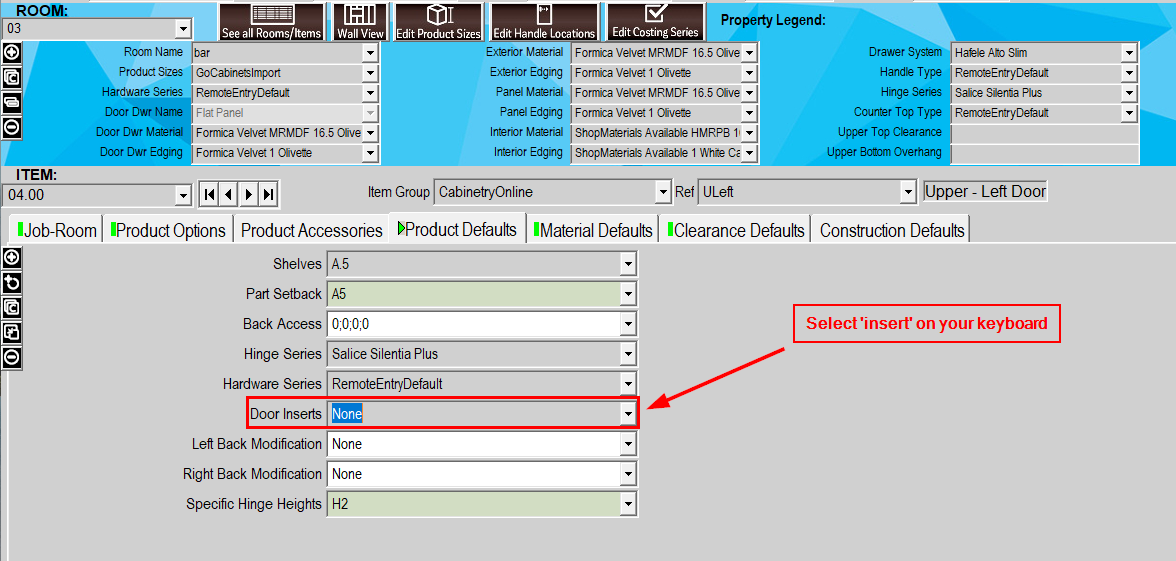
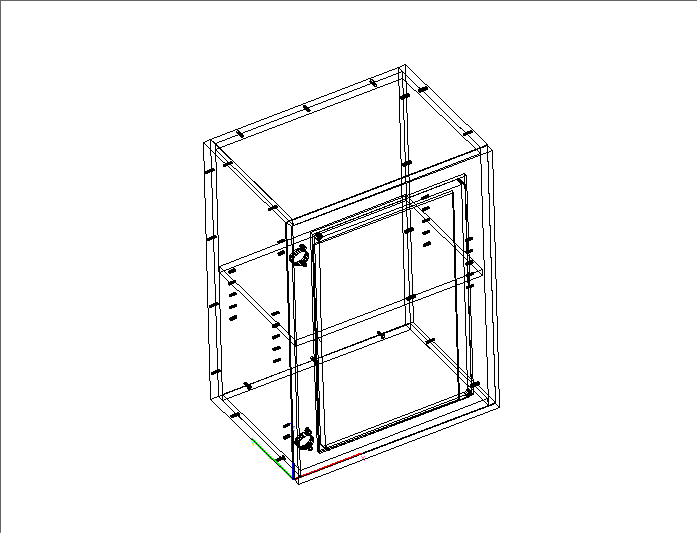
2 - Click in the Door Inserts section and select 'insert' on your keyboard.
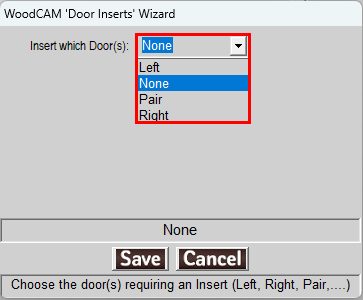
3 - A pop up will appear with a drop down, here you will select on which door you would like the insert.
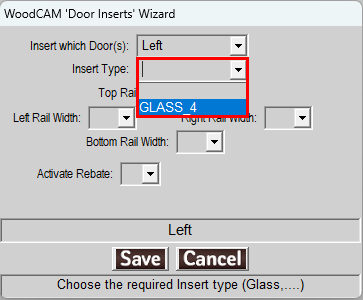
4- Now the Insert Type will appear, select GLASS_4.
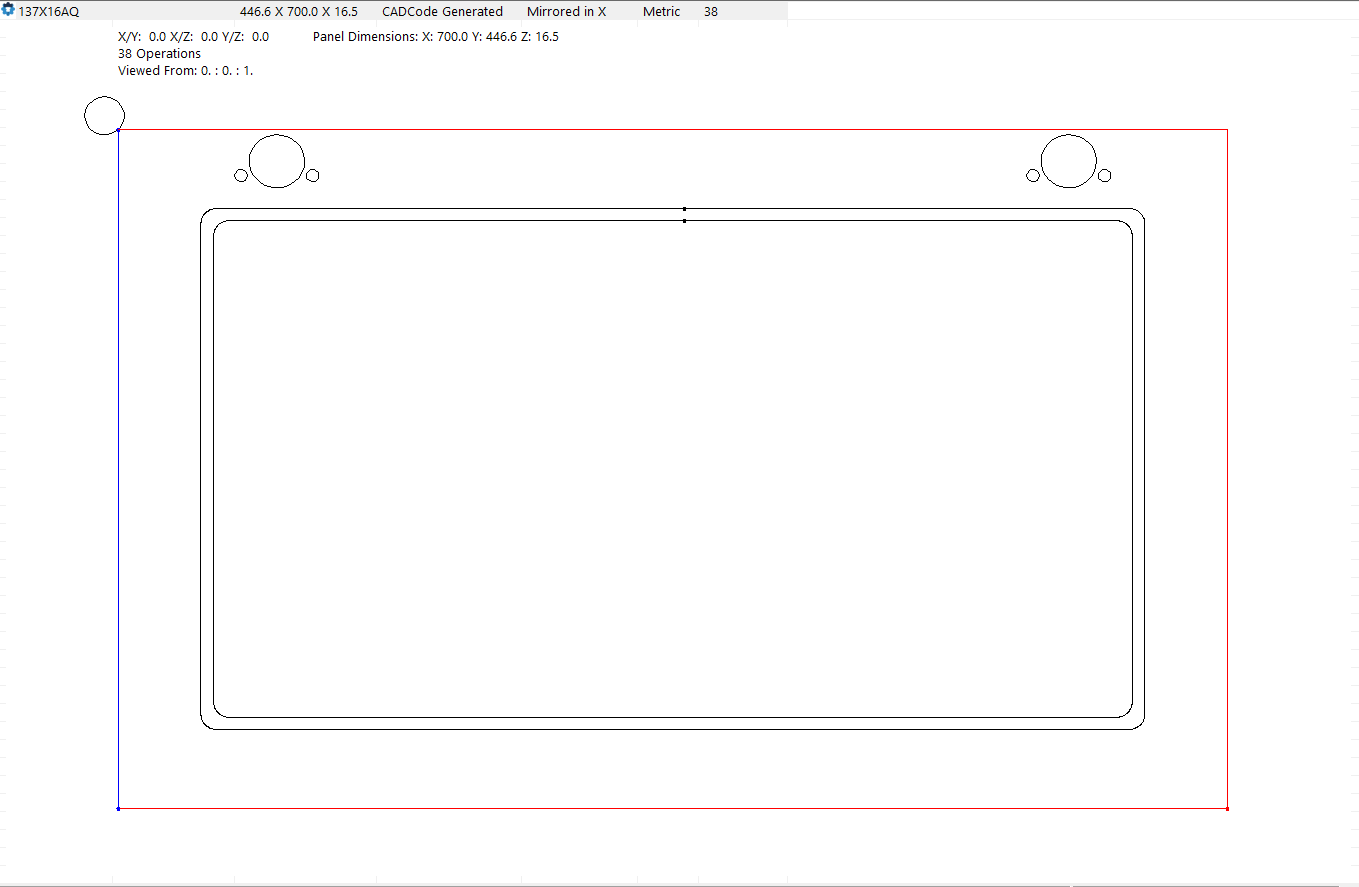
5 - Enter your desired dimensions for the cut out in the four Rail Width sections.
(I will use 60mm for this example)
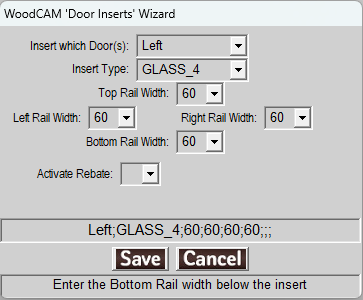
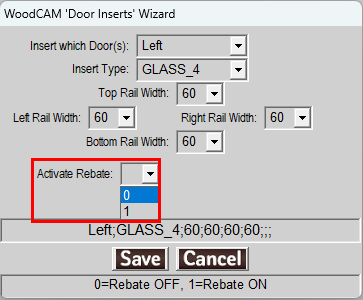
6 - Activate Rebate determines whether or not the glass has an insert to sit on:
1 = Rebate is on
2 = Rebate is off
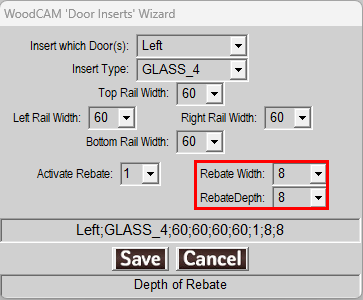
7 - If you chose to add a rebate, two more options will appear asking for the Width and Depth of the rebate.
(I will choose the defaults for this example)
8 - Hit Save and these changes will be applied to the door for this product.
Was this article helpful?
That’s Great!
Thank you for your feedback
Sorry! We couldn't be helpful
Thank you for your feedback
Feedback sent
We appreciate your effort and will try to fix the article